
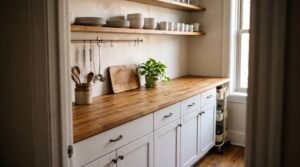
A small kitchen does not fail because it is small. It fails because too many things compete for too little surface, and nobody decided which things deserve the best spots.
If your counters fill up the moment you unpack groceries, your cabinets only close if you push, or you walk into the kitchen and feel tired before you have cooked anything, you are dealing with one of three fixable problems: the layout is fighting you, the storage is not matched to how you cook, or there is simply more visible stuff than the room can visually handle.
This guide walks through all three in the order that saves the most time and money. You will audit what you own, spot the layout mistakes that cause daily friction, free up counter space, use vertical space properly, and reduce visual clutter. There are also specific sections for renters and apartment dwellers and for galley kitchens. Everything here works without a renovation.
How to Organize a Small Kitchen Without Clutter?

The most reliable method has five parts:
- Remove first, organize second. Storage products cannot fix a kitchen that holds more than it can store. Edit what you own before you buy a single bin.
- Store by where you use it. Pans live near the stove, knives and cutting boards near the prep area, glasses near the dishwasher or sink.
- Give daily-use items the easiest-to-reach space. Keep rarely used items high, low, or out of the kitchen.
- Use vertical space. Walls, cabinet doors, and the space inside cabinets are usually the most underused real estate in a small kitchen.
- Keep the counter mostly clear. A counter is a work surface first and storage last.
The rest of this article explains how to do each one, with measurements and examples.
Why Small Kitchens Feel Cluttered?

Before reorganizing, it helps to know which problem you actually have, because the fixes are different.
Common Small Kitchen Storage Problems
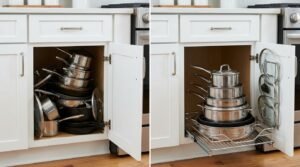
These are the storage problems that show up in nearly every small kitchen:
- Dead depth. Deep base cabinets swallow items at the back. You forget what is there and buy duplicates.
- Dead height. Shelves spaced far apart waste the air between stacked items. A stack of plates with 10 inches of empty space above it is wasted storage.
- Wrong item, wrong place. Daily-use items stored high while rarely used items sit at waist height.
- Duplicates and “just in case” items. Three whisks, two can openers, and a drawer of takeout condiments.
- Awkward shapes. Lids, baking sheets, cutting boards, and sheet pans do not stack, so they end up wedged sideways.
- Storage that doubles as a barrier. Items that must be moved to reach other items will eventually be left out on the counter.
Small Kitchen Layout Mistakes That Create Daily Friction
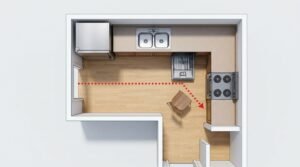
Layout mistakes are different from storage problems because you usually cannot fix them by buying containers. These are the ones that matter most:
| Layout mistake | What it causes | Practical fix |
| No continuous counter next to the sink | Nowhere to prep or set down dishes | Clear and protect one stretch of counter beside the sink; add a sink-over cutting board if needed |
| No landing space beside the fridge or stove | Hot pans and groceries get set down on the floor or wherever fits | Keep a clear 15-inch spot near each, or move a small cart there |
| Tall obstacle between work areas | Walking around a pantry or fridge to move between sink and stove | Rearrange items so the most-used tools are on the near side, not the far side |
| Appliance doors colliding | Dishwasher door and oven door block each other and the aisle | Close the dishwasher door as soon as you finish loading or unloading, before opening the oven |
| Trash and recycling too far from prep | Waste piles up on the counter | Move the bin to the prep side of the sink |
| Small appliances taking prime counter spots | Counter is permanently full | Store, don’t display, anything used less than weekly |
Why these numbers matter. The National Kitchen & Bath Association (NKBA) publishes planning guidelines that designers use. They recommend at least 36 inches of continuous countertop, 24 inches deep, immediately beside a sink for food prep, and at least 15 inches of landing area next to a refrigerator. They also suggest work aisles of at least 42 inches for one cook and 48 inches for two. These are professional design guidelines, not building codes, and many real small kitchens, especially older apartments, cannot meet them. Treat them as a benchmark for what to protect, not a pass/fail test.
Start With a Kitchen Audit Before You Buy Anything

Storage products solve the wrong problem if you keep more than the room holds. An audit takes one to two hours for most small kitchens and is the step that makes every later step easier.
Step 1: Sort Everything by How Often You Use It

Empty one cabinet or drawer at a time, not the whole kitchen, so you do not end up living in a mess. Sort each item into one of four groups:
Daily: used at least several times a week. These get the best storage spots.
Weekly or monthly: used regularly but not constantly. These go in second-best spots.
Seasonal or occasional: holiday dishes, large roasting pans, party platters. These go high, low, or out of the kitchen.
Out: broken, duplicated, never used, or “someday” items.
A useful test for borderline items is: Have I used this in the last year, and would I notice if it disappeared? If the answer to both is no, donate it. Keep specialty items you love and use, even if rarely, but be honest about which are which.
Step 2: Measure Before You Shop
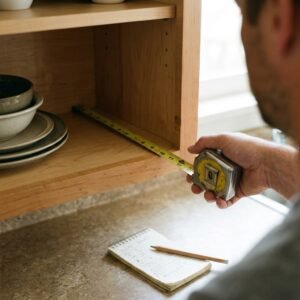
Measure the inside width, depth, and height of each cabinet and drawer, and the clear height between shelves. Write them down or take photos with the tape visible. Also measure your doors and the wall spaces you might use. Most wasted storage purchases fail because the product was a half-inch too deep, or the cabinet hinge blocked the door from closing.
Organize by Work Zones, Not by Category
Most people organize by category: all the pans together, all the bowls together. That feels logical but does not reduce steps. Organizing by where the task happens does.
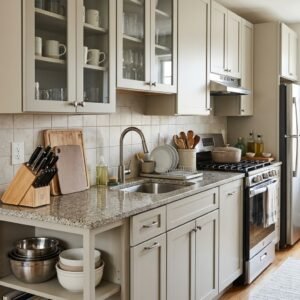
Think of three zones:
- Cooking zone (around the stove): pots, pans, cooking utensils, oils, salt, pepper, and spices you use daily. Keep a clear spot beside the burners to set down a hot pan.
- Prep zone (next to the sink and your longest counter): cutting boards, knives, mixing bowls, measuring tools, and the trash and recycling bin if you can place them nearby.
- Cleanup zone (sink and dishwasher): dish soap, sponges, a drying rack if you use one, and the dishes, glasses, and mugs that come out of the dishwasher.
A fourth area, food storage (fridge, pantry, and any shelves), should hold the most used items at easy reach and bulk items on the far or high shelves.
A simple check: stand at the stove and make a basic meal. If you take more than two steps to grab anything you used, move it.
Safety note for the cooking zone: keep towels, paper products, and plastic items away from active burners, and do not store flammable items above or beside the stove.
How to Maximize Counter Space in a Small Kitchen?
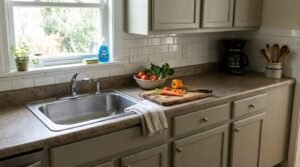
Counter space is the most contested resource in a small kitchen. These approaches work in the order listed, because removing things costs nothing.
Follow the “Daily or Don’t Display” Rule
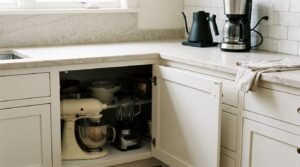
Only items used almost every day earn permanent counter space. For most households that means a coffee maker or kettle, a cutting board, and possibly a toaster. Everything else, including blenders, stand mixers, air fryers, and rice cookers, lives in a cabinet and comes out when needed.
If the idea of putting a heavy appliance away seems like too much effort, make storage easier rather than leaving it out: store it at the front of a lower cabinet or on a pull-out shelf, close to an outlet, so using it takes seconds.
Create Temporary Surfaces
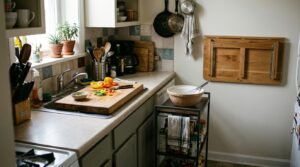
When you need space for a specific task but cannot permanently spare it, add a surface that disappears afterward:
- Sink cover board. A board sized to sit across the sink basin turns the sink into extra counter during prep. Remove it when you wash.
- Rolling cart. Slim carts of 12 to 16 inches wide often fit beside a refrigerator or at the end of a counter. Use the top for prep and the shelves below for storage.
- Drop-leaf or fold-down shelf. A wall-mounted fold-down table gives you a work surface when needed and takes almost no space when closed. Check wall type and weight limits before mounting, and use appropriate anchors.
Safety note: do not use the stovetop as extra counter space unless you are certain no one will turn a burner on while items are sitting on it. Accidental ignition under a board or cookware is a real fire risk, so the sink board and cart are safer choices.
Protect One Work Zone Above All Others
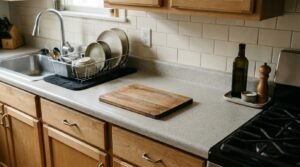
Choose the best stretch of counter, ideally beside the sink or between the sink and stove, and treat it as off-limits for storage. This single habit is usually more valuable than any gadget. If you have only 24 inches of free counter, protect all of it, rather than dividing it across the room.
Vertical Space Planning in Small Kitchens
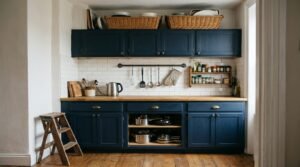
When floor and counter space are fixed, the only direction left is up, and down. Planning vertical space means assigning height levels to different types of items.
Match Items to Reach Zones

Consumer Reports, citing NKBA-certified designer Mary Jo Peterson, describes a “universal reach range” of roughly 15 to 48 inches off the floor, the zone where most people can grasp items easily. Use this as your prime real estate:
| Height zone | Best for | Examples |
| Below about 15 inches | Heavy, low-frequency items | Large pots, slow cooker, bulk bags, cast iron you rarely lift |
| About 15 to 48 inches | Daily-use items | Everyday plates, mugs, pans, cooking oils, spices, frequently used tools |
| Above about 48 inches | Light, rarely used items | Party platters, extra paper goods, seasonal items |
A practical rule: heavy goes low, light goes high, daily goes in the middle. Never store heavy items on high shelves where lifting them is awkward or unsafe.
Add Storage on Walls, Doors and Inside Cabinets
Common vertical upgrades, and when each one makes sense:
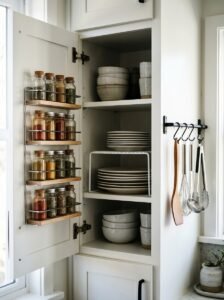
- Shelf risers inside cabinets double usable height for plates, bowls, and mugs where the gap between shelves is wide.
- Inside-door racks suit lightweight items such as lids, foil boxes, cleaning supplies, and spices. Check that the door can handle the weight and that the rack does not hit shelves when closed.
- Wall rails keep utensils and frequently used tools off the counter. Mount them where you actually cook.
- Above-cabinet space works for items used a few times a year, stored in matching baskets or boxes so the top looks tidy.
- Over-the-door organizers for pantry or cleaning supplies work on a pantry or under-sink closet door.
- Pull-out shelves or lazy susans make deep or corner cabinets usable by bringing the back to the front.
Safety note: follow the product manufacturer’s weight limits, especially with adhesive hooks and shelves, and anchor wall-mounted storage into studs or with proper wall anchors for heavy loads.
How to Reduce Visual Clutter in a Small Kitchen?

A kitchen can be organized and still look chaotic. Visual clutter is what your eyes read: too many colors, shapes, labels, and edges in view. In a small space everything is visible at once, so the effect is stronger.
A few ideas that actually help:
- Limit the visible palette. Aim for two or three dominant colors on the counter and open shelves. A mix of 15 different packaging designs reads as clutter even if everything is tidy.
- Hide the noisy items. Cleaning products, sponges, bulk packaging, and mismatched appliances belong behind a door.
- Repeat shapes. Matching jars, uniform containers, and consistent bins quiet a shelf. Decanting is optional, not a requirement, and only useful for items you refill regularly.
- Group, don’t scatter. Three items on a tray (oil, salt, pepper) look intentional. The same three items spaced around the stove look random.
- Leave breathing room. Cabinets and shelves filled to the edge look and feel crowded. Aim for about 80 percent full as a working guideline.
- Clear the vertical lines. Remove papers, magnets, and notes from the refrigerator door and wall except for what you use weekly.
- Choose one display spot. One shelf or one small cluster is enough for items you love. Everything else gets stored.
Troubleshooting: If you decant dry goods, label them with the product name and any expiration date or storage instructions from the original package so you do not lose that information.
Small Kitchen Organization for Apartments and Rentals
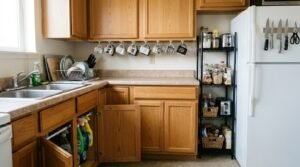
Apartment kitchens add constraints: little or no pantry, builder-grade cabinets, shared storage, and lease rules about drilling or permanent changes. The principles are the same, but the tools differ.
Renter-Friendly Storage That Leaves No Trace

Options that usually do not require drilling:
- Freestanding shelves and carts to add pantry space.
- Tension rods under the sink for spray bottles or in a cabinet for hanging items.
- Magnetic strips and racks on the side of a refrigerator or a metal surface.
- Removable adhesive hooks and strips, used within the weight rating and on clean, compatible surfaces.
- Over-the-door hooks and racks for cabinet or pantry doors.
- Shelf liners to protect surfaces and stop items from sliding.
Always check your lease before making any changes, and test any adhesive on a small hidden area first.
How to Organize a Small Apartment Kitchen in One Weekend?

A realistic two-day plan:
Saturday morning: edit. Empty and sort one cabinet or drawer at a time. Donate, discard, or relocate anything that does not earn its place. Wipe each surface before returning items.
Saturday afternoon: plan. Measure remaining storage. Decide where each zone goes. Make a short shopping list, only for gaps you actually found.
Sunday morning: restock by zone. Place daily items in easy-reach spots near where they are used. Store less-used items high or low.
Sunday afternoon: fix the counter and fridge. Clear the counter except for daily items. Wipe out the refrigerator and group similar items together. Per USDA and FDA guidance, keep the refrigerator at 40°F or below and the freezer at 0°F, so a simple appliance thermometer is a worthwhile and cheap addition.
One week later: adjust. Notice what you keep walking across the room to find and move it.
How to Organize a Galley Kitchen?

A galley kitchen has two parallel runs of cabinets and a corridor between them. It is among the most efficient layouts because everything is within a step or two, but it punishes clutter because the walkway doubles as the work aisle.
Galley Kitchen Layout and Traffic Rules
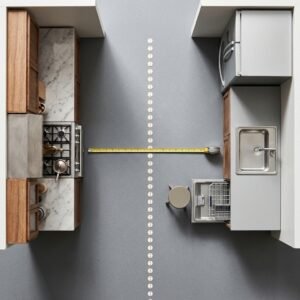
NKBA’s recommendation for a work aisle is at least 42 inches for one cook and 48 inches for two, and at least 36 inches for a plain walkway. Many real galley kitchens are narrower than that, so the goal is to protect the space you do have:
- Keep the floor clear. No stools, bins, or storage on the floor of the aisle.
- Put the prep zone on the side with the most continuous counter. In most galleys the sink run or the stove run has the longer uninterrupted stretch. Make that your protected prep space and keep the shorter run for storage and appliances.
- Watch door swings. Dishwasher and oven doors can block the aisle. Open them only when needed and close them right away.
- Keep the path open at both ends. Avoid storing items in front of the doorway entry.
- Keep a clear landing spot at each end. A spot near the fridge for groceries and a spot beside the stove for hot pans makes workflow smoother.
Storage Strategies for Galley Kitchens

Galley kitchens have long walls and little floor space, so lean on wall and cabinet solutions:
- Wall-hung and rail systems save counter space on the longer run.
- Narrow pull-out pantries use slim gaps next to the refrigerator or at cabinet ends.
- Shallow shelves (6 to 8 inches deep) for cans, jars, and spices stop things from disappearing at the back.
- Window or end-wall space. Many galleys have a window or doorway at one end. A narrow shelf or hanging plants there can add storage without crowding the aisle.
- Keep the heaviest items on the side you reach with the least twisting. In a tight aisle, turning to the opposite side to grab a heavy pot is awkward.
A Simple Maintenance Routine That Keeps It From Coming Back

Organization fails when it requires too much effort to maintain. A few habits matter most:
- Five-minute nightly reset. Clear the counter, wipe it down, put things back.
- One-in, one-out rule. When a new gadget or set of dishes comes in, an old one goes out.
- Monthly mini-audit. Look at the fridge, the pantry, and one cabinet. Remove expired, duplicate, or unused items.
- Seasonal swap. Once or twice a year, rotate seasonal items in and out of prime locations.
- Fix the friction points. If something is always left out, the problem is its storage spot. Move it somewhere easier.
Conclusion

The kitchens that work well are not the biggest. They are the ones where someone decided what deserves the best space and everything else was stored, moved, or removed.
The takeaways worth remembering:
- Edit before you organize. Fewer items beat better containers.
- Store by task, not by category.
- Protect one clear stretch of counter, ideally beside the sink.
- Use height with intent: heavy low, daily in the middle, light high.
- Quiet the visuals with repeated shapes, fewer colors, and breathing room.
- Match the solution to the layout, whether that means renter-friendly storage in an apartment or an open aisle in a galley.
Start with one cabinet today. The result will tell you more about your kitchen than any plan can.